15 Viral Red Nail Designs, Easy DIY Looks You Need
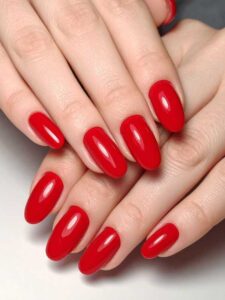
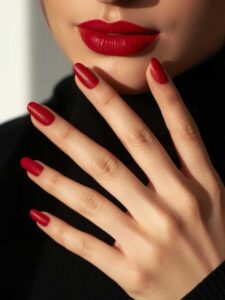
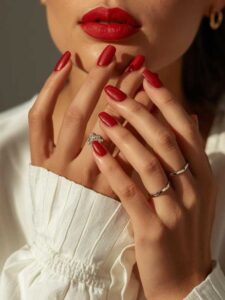
When it comes to the look that’s commanding attention right now, it’s all about red nail designs. This classic shade is confident, passionate, and is currently experiencing a viral resurgence that has swept social media and the fashion world alike. Indeed, red nails are making a bold comeback that cannot be ignored.
You’ve likely heard of “The Red Nail Theory,” a sensation suggesting that wearing red nails makes you appear more attractive and confident, therefore tapping into a nostalgic, classic femininity. Whether you believe the theory or not, one thing is certain: these striking red nail designs command attention.
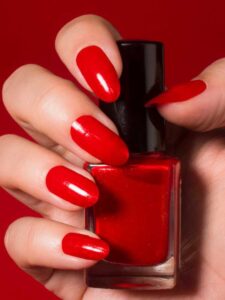
However, this isn’t about the basic single-color polish anymore. Instead, the new wave of red features intricate, jaw-dropping designs that look like they belong in a salon, yet, surprisingly, are incredibly DIY-friendly.
We’ve scoured the feeds and decoded the looks to bring you the ultimate guide. As a result, get ready to ditch the complicated salon booking and grab your favorite bottle of crimson. Specifically, we are breaking down 15 viral red nail designs with easy DIY instructions so you can rock the season’s most stunning looks right from your living room
I. Classic Red Nail Design
These foundation looks have gone viral because of their flawless execution and a subtle, modern twist that makes the traditional look exciting again.
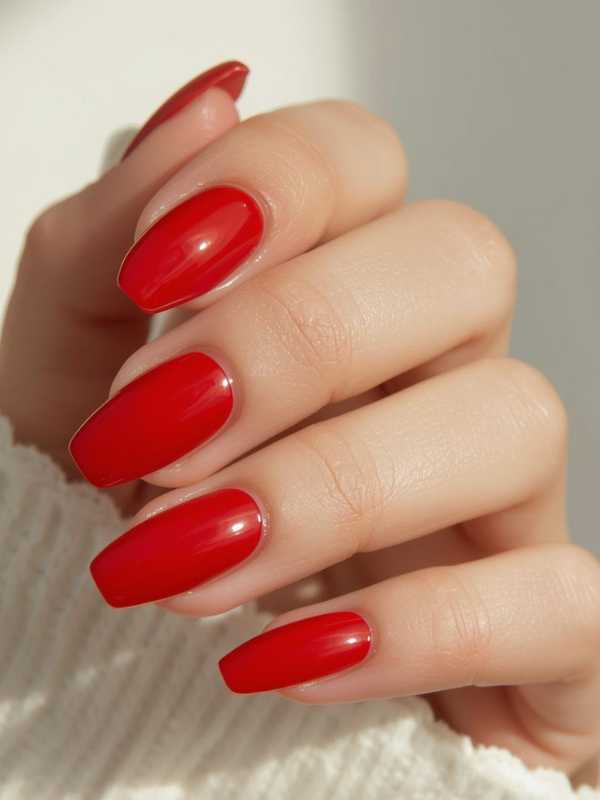
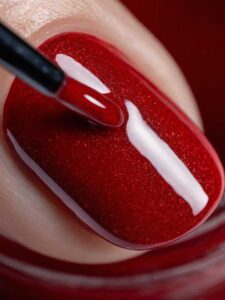
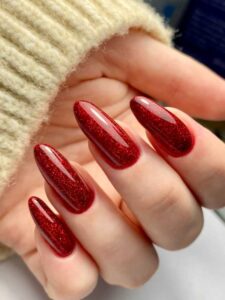
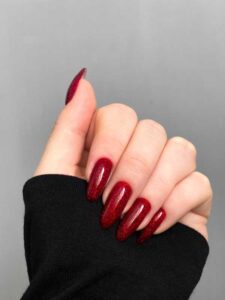
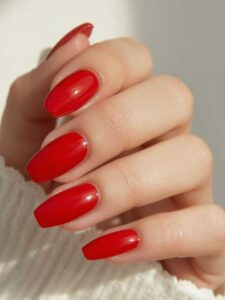
1. The Classic Ruby Red Nail
This isn’t just one coat slapped on; in fact, the viral version of the classic red relies on a rich, almost wet-looking finish and perfect application.
Two Thin Coats, apply one ultra-thin coat, let it dry completely, then apply a second thin coat. Finally, finish with an expensive-looking, ultra-glossy topcoat that seals the deal.
Pro Tip: Use a small, flat cleanup brush dipped in acetone before the topcoat to perfect the edges around the cuticle.
2. The “Balletcore” Red Nail
However, this trend takes the power of red and softens it, fitting perfectly with the delicate, feminine “Balletcore” aesthetic.
The Jelly Polish Look, instead of using a thick cream polish, opt for a sheer, jelly-like red. Apply just one coat to give a translucent, “just bitten” or rosy-stained appearance. Ultimately, the goal is sheer elegance, not opaque drama.
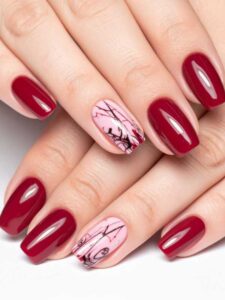
3. The Velvet Red Nail Design
Moreover, this design went viral for its optical illusion, the nails look soft and fuzzy like velvet fabric under light.
Magnetic Magic. You’ll need a special magnetic red polish. Apply one coat, after which hold the accompanying magnet diagonally over the nail for about 15-30 seconds before curing (if using gel) or letting it dry. Consequently, this pulls the metallic particles into a reflective line, creating the “velvet” texture.
II. Simple DIY Red Nail Designs
These gorgeous red nail designs look complicated but are actually incredibly fast to execute, requiring only simple tools you likely already own.
4. Minimalist Red French Tip Design
In fact, A chic, simple twist on the traditional white French. Indeed, this is subtle sophistication at its best.
The Sticker Method. Apply a sheer nude or clear base coat. Use French tip guide stickers (or even a piece of tape) across the nail plate, leaving the very tip exposed. Paint the exposed area with a bright red and then peel the guide off immediately before it dries.
5. The Red ‘Negative Space’ Dot Look
The ultimate minimalist statement. A perfect, singular dot in an unexpected location.
Moreover, The Dotting Tool, apply a clear base coat or a nude polish. Use a dotting tool dipped in red polish and gently press it onto the center of the nail, or right at the base by the cuticle. Therefore, the precise circle makes the look instantly polished.
6. Red & Gold Foil Accent Design
Adding a touch of luxury without the intricate painting. In particular, this is the perfect accent nail.
Additionally, the Sticky Base, paint your accent nails (ring or middle finger) with red polish. While the final coat of red is still slightly tacky, use a tweezer or a silicone tool to gently press small flakes of gold foil onto the tacky surface. Next, seal heavily with a topcoat.
7. The Two-Tone Ombre Red Manicure
A quick color transition that looks like you spent hours blending.
Moreover, The Makeup Sponge. Apply a deep red base color. Next, on a small makeup sponge, paint stripes of both the deep red and a brighter, lighter red. Gently dab the sponge across the tip of the nail, moving slightly toward the center, until the colors softly blend.
III. Seasonal Red Nail Designs & Trendy Viral Looks
These red nail designs are perfect for holidays, winter, or current seasonal fashion cycles.
8. Holly Berry Glaze Red Nails
This is the trending “glazed donut” finish, but in a rich holiday red.
Chrome Powder. Paint your nails with a rich, opaque red. Once fully dry (or after curing a non-wipe gel), gently rub a silver or pearl chrome powder onto the nail surface using an eyeshadow applicator. Finally, finish with a shiny topcoat.
9. Checkerboard Red Accent Nail
A trendy, graphic look that breaks up the solid red set.
A Fine Liner Brush. Paint all nails a solid red, except for one accent nail which is painted a nude or white base. Using a fine liner brush and red polish, paint a simple grid pattern on the accent nail, thereby creating the checkerboard effect.
10. “Sweater Weather” Textured Red Nails

The viral “cozy” nail look that mimics the texture of knitwear.
In fact, Matte & Texture. Paint your nails a deep, matte red. For the texture, apply a clear, thick topcoat or a specialized clear sugar-effect topcoat (or mix clear dip powder into a topcoat) only on top of the “cable knit” lines you draw with a thin brush.
11. Red Aura Nail Design
The subtle gradient that looks like a glowing energy field.
Furthermore, The Sponge Blend. Paint the nail with a darker red shade. Once dry, place a small drop of a lighter red or hot pink in the center of the nail. Use a small, flat eyeshadow applicator, makeup sponge, or blush brush to gently dab and blend the lighter color outward, thus creating a soft glow.
IV. Bold & Glam Red Nail Designs
These spectacular red nail designs require a touch more patience and a few more tools, yet deliver serious, eye-catching glamour.
12. Red Cat Eye Design
An intensely reflective look that makes the polish appear to move under the light.
Moreover, This requires Cat Eye Magnetic Polish. Apply one coat of the specialty polish. Hold the strong, circular magnet (often included) over the nail for 15 seconds to draw the metallic shimmer into a focused, diagonal, or curved line.
13. Red Leopard Print Nail Trend
A fun, fierce design that’s easy to create with varying dot sizes.
Two Dotting Tools. Paint a bright red base. Using a large dotting tool, place random nude or light pink dots around the nail. Once dry, use a smaller dotting tool and black polish to create a broken, C-shaped outline around parts of the nude dots. As a result, you get a playful yet polished look.
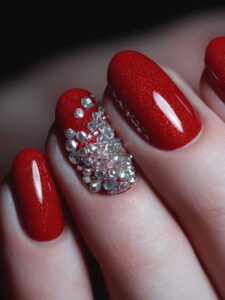
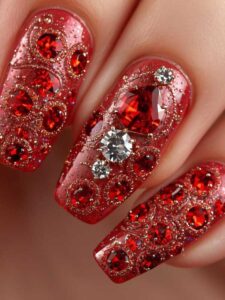
14. The Heart-Shaped Glitter Red Look
A sparkling accent, perfect for romantic holidays or simply showing some love.
Moreover, Topcoat Placement. Apply a solid red base. Use a thick topcoat or clear glue to pick up individual small heart-shaped red glitter pieces. Place them strategically at the base of the nail, or apply a generous amount of chunky glitter at the cuticle and gently brush it downward for a gradient effect.
15. Red ‘Lipstick’ Nail Shape
This look is defined by its viral, unique shape, not the design itself.
File for the Shape. You need long nails for this. File your nails into a straight-edged coffin or square shape. Then, file one side of the tip diagonally, creating a slant that mimics the slanted tip of a fresh tube of lipstick. Finally, finish with any deep red opaque polish.
DIY Tips & Tricks
To achieve that salon-quality look with your new red nail designs, preparation and the right tools are key.
The Must-Have Tools
First, invest in a fine liner brush (essential for French tips and small designs), a set of dotting tools (for perfect circles), and moreover, a high-quality, quick-dry topcoat. These tools will dramatically improve your results.
Prep is Everything
Never skip cuticle care. Gently push back cuticles and buff the nail surface lightly. Wipe the nail plate with rubbing alcohol or nail polish remover before the base coat so that all oils are removed.
Perfect Cleanup
For the sharpest edges, keep a small, flat brush dipped in acetone nearby. Use it to “trim” any polish that has accidentally touched your skin before the topcoat goes on. Otherwise, the entire design can look messy.
Furthermore, Red nails aren’t just a beauty choice, they’re a whole mood. They make you feel confident, bold, stylish, and instantly put-together. This article explored 15 viral red nail designs that prove you don’t need a trip to the salon to look stunning. From the classic glossy red to matte elegance, glitter glam, ombre blends, chic French tips, and creative accents like hearts, stripes, marble, and rhinestones, there’s something for every personality and every occasion. Each design is easy enough to recreate at home, even if you’re a beginner, and every style offers a fresh way to express yourself without breaking the bank.
What makes these red nail looks so exciting is how versatile they are, some are simple and timeless, others playful and flirty, while a few bring full drama with sparkles or nail art. No matter which ones you choose, red nails always carry that powerful energy that never goes out of style. That’s why they go viral over and over again.
Finally, Now that you’ve discovered these beautiful DIY-friendly styles, don’t just stop at reading, try them out! The more you practice, the better your technique becomes, and soon you’ll be creating salon-worthy looks right from your home. Grab your polish, pick your favorite design, and have fun experimenting. Your next gorgeous red manicure is literally in your hands.
This Post Showed you 15 Viral Red Nail Designs, Easy DIY Looks You Need
Also, You May like: